Microwave Apple Crisp

Standard

eugenie apple crisp

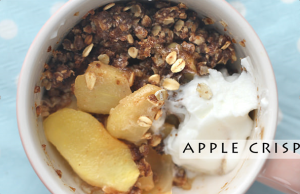
Since Thanksgiving is around the corner, I thought I’d introduce the microwave version of my favorite Thanksgiving dessert.  All you need is six ingredients and about fifteen minutes.  It’s easy, delicious, and fast, and it makes just enough for one satisfying serving, unless you want seconds.

Ingredients:

1 apple

2 tablespoons quick oats

2 tablespoons all-purpose flour

1 tablespoon brown sugar

1 tablespoon melted, unsalted butter

1/8 teaspoon ground cinnamon

Optional: A nice heaping of whipped cream or ice cream!  It tastes so much better with cream!

Instructions:

1. Peel the apple.  Core it, then slice it thinly. This will be your filling!

2. Mix the rest of your ingredients (quick oats, brown sugar, flour, cinnamon, and butter) in a mixing bowl.

3. Put your apple slices in a microwave-safe mug.  Make sure your mug is big enough that the apples fill less than half-way.  A bowl works too!  (The apple slices will have shrunk by the end, but you don’t want them to go over the edge of the cup while they’re cooking.)  Cover it, and microwave for 30 seconds.

4. Spoon your oat mixture over the top.  Try to make it even.  Now microwave for a full minute.

5. Let it sit for a few seconds so it doesn’t bubble over the edge of the mug, then microwave for another 30 seconds.  Repeat once more.  Now you’re done!  Once it’s cooled, you can dig in!  Doesn’t that smell delicious?

Credit: http://eugeniekitchen.com/apple-crisp/
Microwave Potato Chips

Standard

I made these in the microwave. Really!

Yes, I know.  Microwave potato chips.  They do come out of a microwave, but trust me.  Unlike most nuked food, these are actually crispy.  They’re also healthier than the normal potato chip, because they use much less oil. I’ve tried making these before, but foodgal’s tips made my chips better, so I’m sharing a mashup of our recipes.  Depending on how thinly you slice your potatoes, the amount of each ingredient will change.

Ingredients:

1-2 pounds of potatoes (foodgal said Yukon Gold or red, I say whatever you have in the kitchen)

1-3 tablespoons of oil (if you cut your potatoes super thin, you may need more)

1 teaspoon salt (add to taste- I like my salt)

Something to grease your plate with- oil, butter, or cooking spray

Optional: onion powder, chili powder, garlic salt, be creative!

Directions:

1. Grease your microwave-safe plate, just well enough to cover the whole surface

2. Slice your potatoes.  This may take a while, if you want thinner (and crispier!) chips.  But if you’re impatient and hungry, like me, mangled chips or thicker chips in the style of kettle chips still taste great.

3. Toss your potato slices in a bowl with your oil and salt.  Try to get a bit of oil and salt on every slice.  Feel free to add a little more salt and oil if you need to.

4. Arrange your slices on the greased microwave-safe plate in one layer.  Overlapping chips in multiple layers means they won’t be crispy.  I like to form spirals.

5. Microwave uncovered for 2-3 minutes, or until it starts to turn brown (may be 30 seconds if you sliced your potatoes really thinly).  Thinner slices brown faster.  Turn your slices over (I use a fork or chopsticks because they are HOT) and repeat.

6. Once both sides have been microwaved, take them out!  Wait for them to cool and turn crispy.  This shouldn’t take too long, unless your slices are on the thicker side. And even then, potato slices taste great!  Now distribute your chips among your friends (but only if you want to) and enjoy!

Credit: http://www.foodgal.com/2010/01/microwave-potato-chips-really/

Microwave Mac & Cheese

Standard

Who doesn’t like mac and cheese?  I love it, but I find that a whole bowl of it can be too much.  This recipe is perfect for a small, but filling snack, and the most you’ll have to wash is a mug and a spoon!  Honestly, that’s the best part.  Easy cooking and easy cleaning.  (Wash as soon as you’re done eating, or soak your mug in hot water to get rid of the cheese and make for easier clean up.)


Ingredients:

1/3 cup macaroni/ any small pasta you have on hand

1/2 cup water

1/4 cup milk (whatever kind you have)

1/2 cup shredded cheese (cheddar probably works best, but feel free to mix in your favorites)

Optional: teaspoon of butter/ ground pepper


Directions:

1. “Boil” your pasta by combining the pasta and the water in a large mug.  Microwave on high for 2 minutes, then stir.  I recommend doing this on 20 second intervals, so the water doesn’t spill over.  That should be 6, 20 second intervals.

2. Check the pasta.  Repeat until desired firmness.  For me, this usually takes another 2 minutes, but I have a strong microwave.  If you like your pasta softer than al dente, you might want to cook for 4 extra minutes instead of 2.  Stir at every interval.  (All the water should be absorbed.  If the pasta isn’t cooked yet, add another spoonful of water, and cook for another few intervals of 20 seconds.)

3. You’re almost done now!  Remove your mug from the microwave, and stir in the milk and cheese!  (Add the butter and pepper here too if you want.)  Be careful with the hot mug, but everything should eventually melt into gooey goodness as you stir.

4. Enjoy!  You can always make another mug for yourself, or share with a friend!

Credit:

I’ve seen this recipe more than once, and I’ve added butter and pepper to mine, but here’s the most recent one I’ve seen: http://www.babble.com/best-recipes/instant-mug-o-mac-cheese-in-the-microwave/

The picture is also from babble.com

Microwave Mashed Potatoes

Standard

Desserts will always be my favorite, but there’s something to be said for mashed potatoes.  They’re easy, (or at least this recipe is) filling, and flavorful.  Here’s three variations you can make it with a microwave!

Ingredients:

4 approximately 6-ounce potatoes, peeled and cut into 1 inch cubes (doesn’t have to be perfect!)

1/2 cup reduced-fat sour cream (go for normal sour cream if you’re going all out)

1/2 cup 1% low fat milk (2% works too)

2 tablespoons minced fresh chives

1/2 tablespoon salt

1/2 tablespoon ground black pepper

(See below for alterations for the variation of microwaved mashed potatoes you like best)

Instructions:

  1. Put your cubed potato into a big microwave-safe bowl. Stretch some plastic kitchen wrap over the bowl to cover it, then cut a small slit, about an inch is good.
  2.  Microwave on high for about 10 minutes. Let it stand for 2 minutes.
  3. Add the sour cream and all the other ingredients to the bowl.
  4. SMASH!  You can use a fork, or a potato smasher if you have one.

SOUTHWEST VARIATION:

  1.  Leave out the sour cream and chives
  2. Decrease milk to 2 tablespoons and decrease the amount of salt to 1/4 teaspoon
  3. Add 3/4 cup plain low-fat yogurt, 1 tablespoon chopped chipotle chile, canned in adobo sauce, and 1/4 teaspoon ground cumin

ROASTED GARLIC VARIATION:

  1. Leave out the sour cream and chives
  2. Increase the amount of milk to 3/4 cup.
  3. Add 1/4 cup coarsely chopped roasted garlic cloves and 1 tablespoon chopped fresh sage.

BACON AND CHEDDAR VARIATION:

  1. Decrease salt to 1/4 teaspoon.
  2. Add 1/4 cup (1 ounce) shredded reduced-fat extra-sharp cheddar cheese and 1 slice center-cut bacon (cooked and crumbled, mash to the consistency you like)

Enjoy!  This makes about 4 servings.

Credit: http://www.cookinglight.com/food/recipe-finder/microwave-recipes/microwave-smashed-potatoes

Continue reading

Nutty Brittle!

Standard

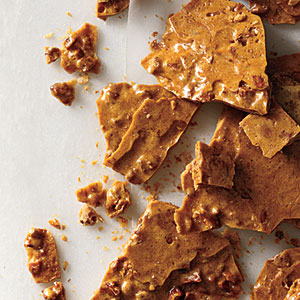
Craving something sweet?  Want something you can easily bring to a group hangout and share?  Not very confident of your cooking ability?  How do you feel about Peanut brittle?

Ingredients:

1 cup sugar

1/2 cup light-colored corn syrup

3/4 cup cup coarsely chopped toasted almonds (or a nut of your choice)

1 tablespoon butter

1/2 teaspoon vanilla extract

1/8 teaspoon salt

1 teaspoon baking soda

Instructions:

1. Line a pan with parchment paper.

2. Mix the sugar and syrup in a microwave-safe bowl.  Microwave on high for around 3 minutes, depending on your microwave.  When the mixture is clear and bubbly, remove.

3. Stir in the almonds or nut of your choice.

4. Microwave on high for about another minute.  Stir.  Repeat this three times, or until your mixture is the color of light caramel.

5. Stir in butter, vanilla, and salt.

6. Microwave on high for 90 seconds, or until your brittle mixture looks like chunky peanut butter.  Then add the baking soda, and stir until everything is foamy.

7. Immediately pour the contents of your bowl onto the pan you prepared in step 1.

8. Spread it so it’s about 1/4 inches thick.  Leave it alone for half an hour to cool and harden.  Then break it into pieces.

Now you’re done!  Break your brittle slab into pieces, and if you store it in an airtight container, like a ziploc bag, it should stay yummy for a week.  Enjoy!  And share with friends.  This should make enough for a dozen of your friends.  Or less, if you all eat like I do.

Credit: http://www.myrecipes.com/recipe/almond-brittle-50400000127539/

Microwave Choco Pudding

Standard

It’s still early in the school year, but that dreaded time has come. Midterms. In between study sessions, I find myself craving something sweet and easy. What’s easier than a chocolate pudding you can whip up with a microwave in about 15 minutes? This recipe makes 4 servings, so share some with your study group!

Serving size: 4 cups of puddin

Ingredients:

  • ​1/2 cup white sugar
  • ​1/3 cup unsweetened cocoa powder
  • 3 tablespoons cornstarch
  • ​2 cups milk
  • ​2 teaspoons vanilla extract
  • Optional: (for toppings) chopped bananas, sliced almonds, caramel drizzle

Instructions:

  1. Whisk the dry ingredients together in a microwave-safe bowl.  Add the milk in a little at a time to avoid lumps.
  2. Cook everything for one minute.  Stir, then cook again for another minute.  Stir.  Continue microwaving for one-minute intervals, and stirring until the pudding looks shiny and thick.
  3. Then stir in the vanilla.
  4. Carefully place a piece of plastic kitchen wrap smoothly onto the surface of the pudding.  This will prevent a rubbery layer of “skin” from forming.  Chill in the refrigerator.  Once the pudding has set, it’s ready to serve!
  5. Stir in chopped bananas and sliced almonds or whatever you feel goes with chocolate pudding!

Enjoy!

Source: AllRecipes.com

One Minute Cheesecake

Standard

fastcheesecake2

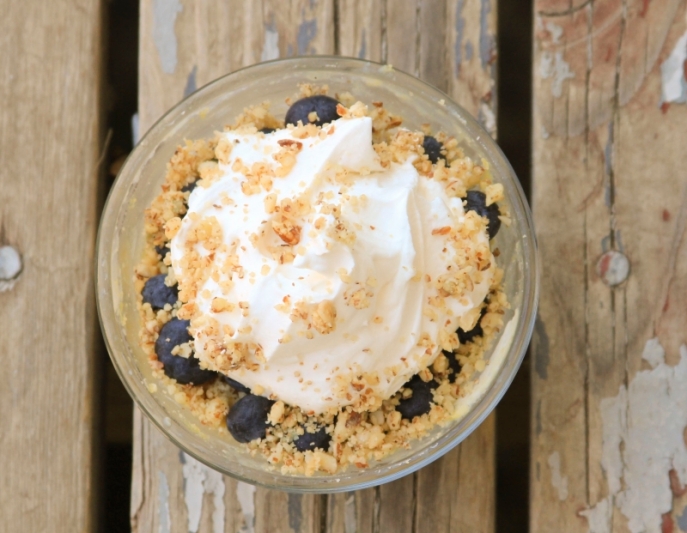
Are you ever craving something just a little unhealthy after dinner, or at three in the morning? We are.  But we’re usually too busy, or too lazy to put anything together.  This recipe from yourlighterside.com solves that problem with a few ingredients, some creativity, and a microwave.

Serving size: one cup’s worth of cheesecake

Ingredients:

  • 2 oz. cream cheese, softened
  • 2 tablespoons sour cream
  • 1 egg
  • 1/2 teaspoon lemon juice
  • 1/4 teaspoon vanilla/ vanilla extract
  • 2-4 tablespoons sugar/ sugar substitute

Optional:

  • Fresh fruit for toppings, or to be swirled into the cheesecake
  • 1 graham cracker to crumble and press into a crust under the filling)

Instructions:

  1. Mix everything together in a microwave-safe bowl.
  2. Place in microwave on high heat for 90 seconds.  Stir every 30 seconds. Keep in the refrigerator until you serve it.
  3. If you’re so inclined, go for whatever berry is in season, smash a couple, and fold them into the cheesecake filling.
  4. Smash a graham cracker into crumbs.
  5. In a ramekin, cup, or small bowl, mash the crumbled graham cracker into the sides of your container until it takes the shape of a crust.
  6. Spoon in the filling.
  7. Top with fruits and your choice of whipped cream, Nutella, caramel, or whatever you have on hand.  Or all of the above.

Enjoy!

Source: yourlighterside.com